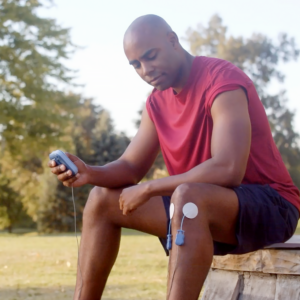
Electrode Placement

Please consult the Quick Reference Guide for complete placement instructions. BioWaveGO Quick Reference Guide
BioWaveGO electrode placements are different from conventional electrical stimulation. The mixing of the patented therapeutic signals occurs in a 3.5-inch hemisphere (imagine half of a grapefruit) beneath and surrounding each electrode, not along the surface of the skin between the electrodes. As a result, electrodes need to be placed directly over locations of pain, or one electrode over a single location of pain and a second over a comfortable location to recieve stimulation – typically over a bony prominence near the treatment site.
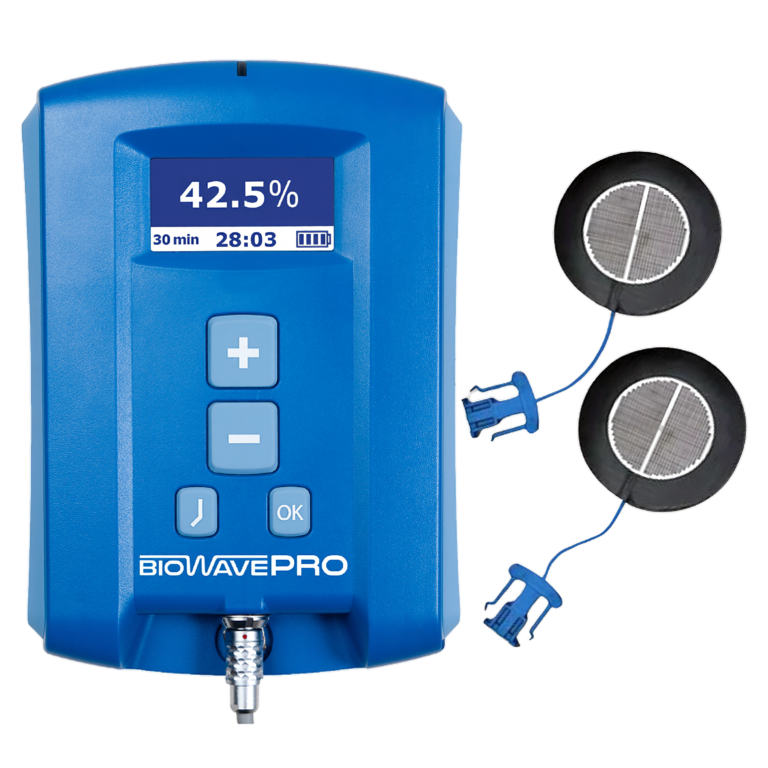
BioWave Noninvasive Electrodes
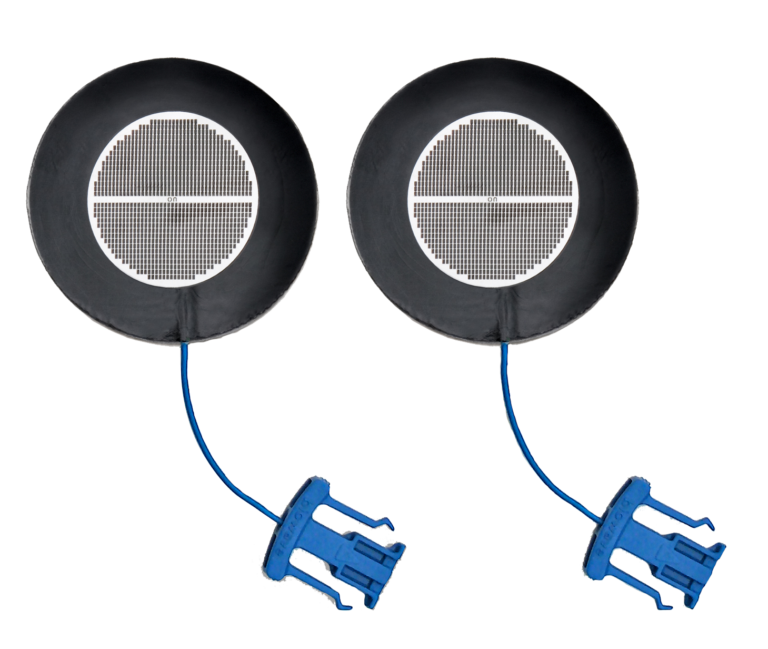
2 locations of pain
Use B-set Pads or GOPADS: Two 2” diameter round pads should be each placed directly over a painful area.
Pads may be placed:
- directly over 2 locations of pain; or
- over the origin or source of pain, and over the most painful location that is closest to the origin of pain (for example, for sciatica, one pad is placed over the spine (origin) and one pad is placed on the buttock (most painful location closest to origin); or
- one inch apart from one another to treat a large area of pain
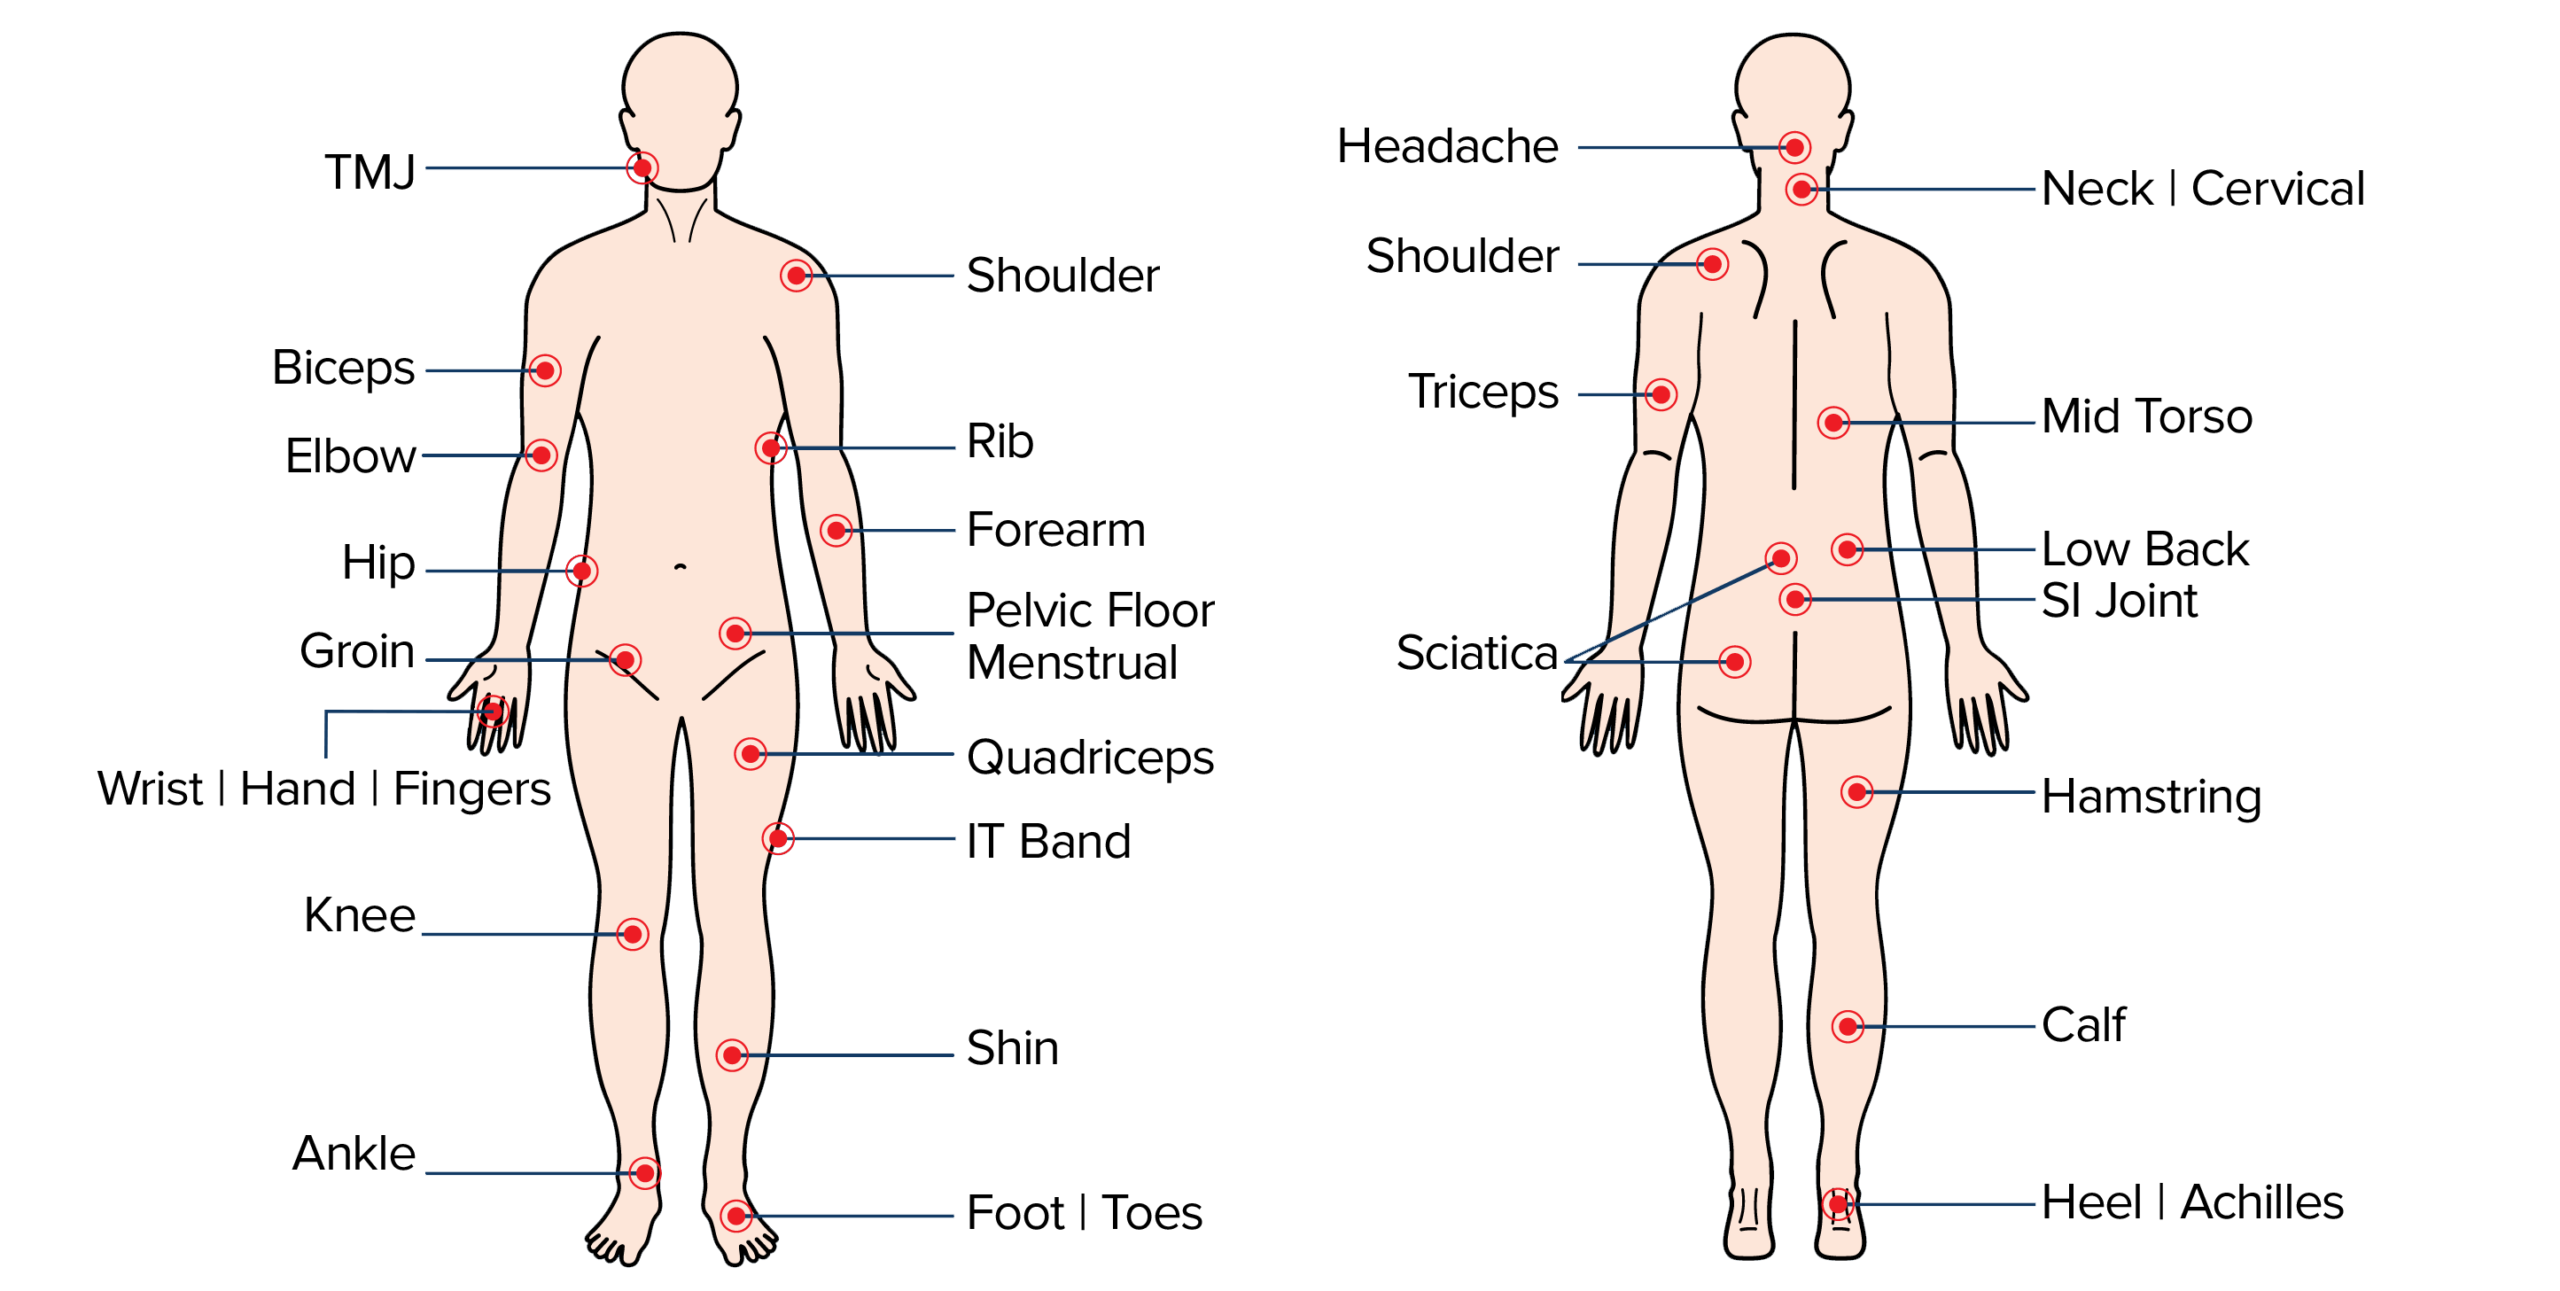
The B-Set is used for treating pain in the following areas:
- pain in one or two locations in the back including, buttocks, lower back or mid back region
- radiculopathies (radiating pain down the back or side of the leg)
- pain in the two locations in the hip or groin
- pain in two locations in the cervical spine, shoulders or knees
- pain centered directly in the spine
- pain presenting in a large area
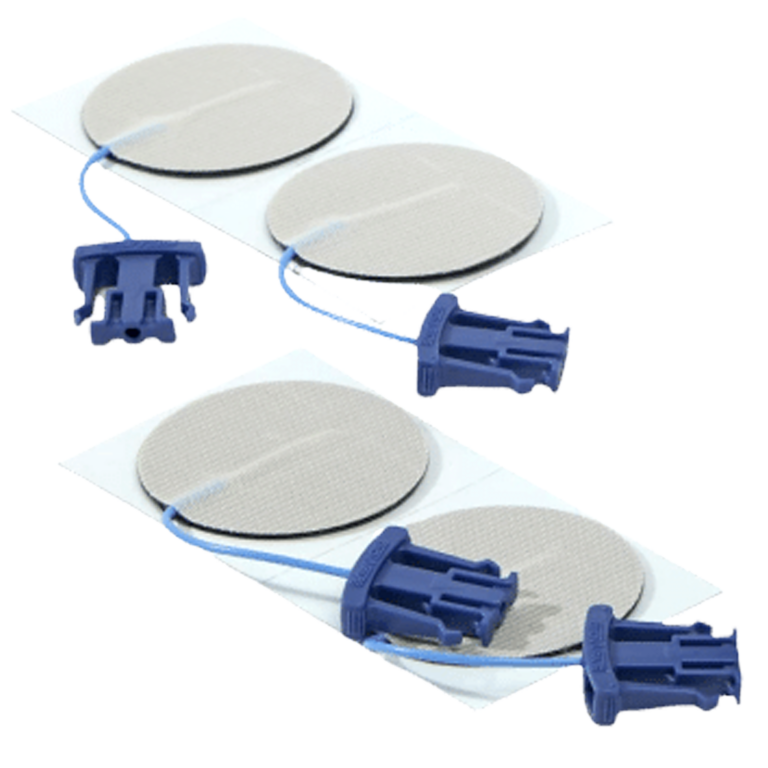
1 location of pain
Use E-Set Pads: One small 1.38” diameter round pad is placed directly over a single location of pain; the second 2” x 4” rectangular dispersive pad is placed over a bony area which is a comfortable location to receive stimulation.
Pain conditions treated with E-set Electrodes include:
- One location of pain on extremities including knees, ankles, feet, toes, neck, shoulders, elbows, wrists, hands and fingers
Please consult the Quick Reference Guide for complete placement instructions. BioWaveGO Quick Reference Guide
Contraindications
Understanding BioWave’s contraindications and warnings ensures safe and effective use. This section outlines when BioWave should not be used, where electrodes must not be placed, and important precautions for patients with specific medical conditions or implanted devices.
- DO NOT USE on patients with a cardiac pacemaker or defibrillator as the stimulator may interfere with its function.
- DO NOT USE any electrodes over the heart or across the thoracic volume. Electrodes can be applied to the back of the thorax and lateral aspect of the upper limb (i.e. below/down the shoulder).
- DO NOT PLACE the electrodes on the front or side of the neck.
- DO NOT PLACE electrodes on top of the head.
- DO NOT USE on patients prone to seizure (for example, epileptics).
- DO NOT PLACE electrodes and DO NOT USE the stimulator over open wounds, broken skin, rashy skin or sensitive skin areas (e.g. sunburned skin).
Warnings
Electrodes
- must never touch each other
- Minimum Spacing Between Electrodes = 1 inch
- Do NOT use electrodes if The metal portion of the wire is exposed; or
- Do NOT use electrodes if the gel has peeled apart from the black carbon surface
- Do NOT use electrodes if the surface of the hydrogel is worn down
Pregnancy
BioWave CAN BE USED on pregnant patients. Anecdotal evidence suggests BioWave may be helpful with back and hip pain in pregnant patients. However, PADS CANNOT BE PLACED over the belly of a pregnant patient. Patients should consult with their physician regarding use of BioWave during pregnancy & labor. See BioWave’s protocol for use during pregnancy.
Cancer
BioWave CAN BE USED on patients with cancer. Please consult with your physician prior to use.
BioWave MAY be used for the following:
- BioWave stimulators MAY BE USED on patients with implanted drug pumps, spinal cord stimulators, peripheral nerve stimulators or other implanted electrical stimulation devices. Implanted electrical stimilation devices should first be turned off remotely before using BioWave.
- Electrodes MAY BE PLACED on the back of the neck and bioccipitally on the back of the skull.
- BioWave electrodes MAY BE PLACED and BioWave stimulators MAY BE USED over scar tissue,
tattoos or any other intact skin area.
- BioWave stimulators MAY BE USED to treat over body locations that have implanted orthopedic
hardware made from metal or other materials including total joint replacements, pins, screws,
plates, rods, and anchors.